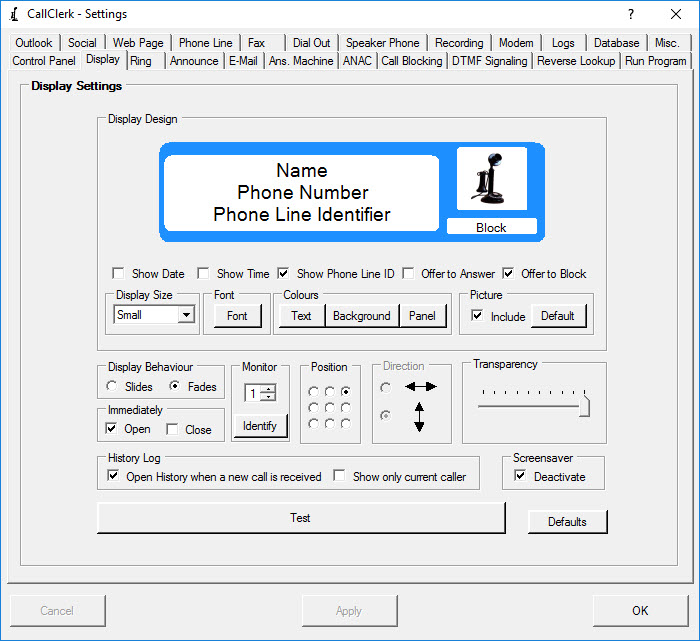
CallClerk - Settings Display Window
The CallClerk - Settings - Display window has several options that may be set, where appropriate click the check box or radio button beside the option to enable or disable the option. When a check or radio button is selected then that option is enabled otherwise that option is disabled.The options on this window are:
1. The Caller ID Display size (small, medium, large) of the CallClerk Display window;
2. If the Display window should include the date and time;
3. If the Display window should include the Phone Line Identifier of the line on which the call is being received;
4. If CallClerk should offer to answer the incoming call (modem must be in TAPI mode using a voice modem);
5. If CallClerk should offer to block the incoming call (for calls received by this PC that are not from familiar callers);
6. Font; click on the Font button to change the Font of the text in the display;
Please note, CallClerk will automatically and dynamically optimize the font size on the pop-up display
7. Colours, click on the Font, Background, and Panel buttons to change the colour of the Font, Background and Panel of the display;
8. The default picture to be show when the CallClerk Display window is opened;
9. If the CallClerk Display window should slide open and close or alternatively fade in and out(*);
10. If the CallClerk Display window should open and/or close immediately;
11. If you have mulitple computer montiors hooked up to your PC, the monitor on which the Pop-up Display will appear;
12. The screen position; select where on the screen you would like to CallClerk Display window to appear from. Options include Top Right, Top Middle, Top Left, Middle Right, Middle, Middle Left, Bottom Right, Bottom Middle, and Bottom Left;
13. Direction, depending on the Screen position setting you may also be able to choose the direction in which the CallClerk Display window appears from;
14. Transparency(*); you may slide the slider left and right to make the CallClerk Display window more (to the left) or less (to the right) transparent (see through);
15. Open History window when a new call is received. The purpose of this setting is to allow you to quickly see a list of all previous callers when you return to your workstation after being away from it for a while. If this option is checked the CallClerk History window will be opened after the CallClerk Popup Display has been closed. However, if you click on the CallClerk Popup Display when it opens it will close automatically and the CallClerk - History window will not be opened; this will only happen for Familiar, Unfamiliar, and Custom callers - it will not happen for Blocekd callers.
In conjunction with this option you can also chose to show only the call history for the current caller (only) when the History window opens. When the History window is opened in the way, pressing F2 in the History window will revert it to displaying the history information for all callers.
16. Deactivate Screensaver. If checked, CallClerk will attempt to deactivate your screensaver when the display window is to appear.
Click the [Test] button to experiment with these options.
Once the current settings have been modified the changes may be permanently applied by clicking on the [Apply] or [OK] button or voided by clicking on the [Cancel] button. If either the [OK] or [Cancel] button is pressed then the CallClerk - Settings window will be hidden.
The CallClerk - Settings - Display window looks like: