CallClerk - Sending and Receiving Faxes
You can use CallClerk to send and receive faxes.To do this your modem will need to support faxing in TAPI mode. As CallClerk uses TAPI to send and receive faxes you can use other fax programs, such as the one that comes with Microsoft Windows 2000 and XP Pro, in conjunction with CallClerk to also send faxes. For example from Microsoft Word you can send a fax using the Microsoft Fax facility while CallClerk remains running.
Receiving Faxes
There are six ways to set CallClerk up to receive a fax:
1. Identify the caller's number as a fax machine in the CallClerk Directory.
When you do this CallClerk will answer calls from the caller as a fax call and automatically start receiving the fax. Because CallClerk will know the caller is a fax machine based on the caller's number, CallClerk can pick up the call and start processing the incoming fax usually after just one ring.
2. When the call comes in, you can manually answer it by clicking on the Answer button on the CallClerk Display window and then click on the [Receive Fax] button on the CallClerk Dial Out window.
3. You can place a call using the CallClerk Dial Out window and when the other party is ready to start sending you their fax you can click on the [Receive Fax] button on the CallClerk Dial Out window.
4. You can have someone call you, let the answering machine pick up and then have them press "*" (star) on their phone's key pad to have CallClerk enter fax receive mode. If you would like to do this often you can customize your default answering machine greeting to instruct callers to press star now to start sending a fax.
5. You can have CallClerk treat all Unfamiliar Callers as fax callers; this is done on the CallClerk - Settings - Fax window. Once this option is checked all incoming calls from new numbers and numbers in your CallClerk Directory. that are marked as unfamiliar callers will be treated as faxes.
6. Have CallClerk automatically receive a fax your modem reports a distinctive ring; this option is set on the CallClerk - Settings - Fax window.
Sending Faxes
There are two ways you can set CallClerk to send faxes:
1. On the CallClerk History window select a history entry with an associated fax and then from the menu select Faxes - Forward Fax via Fax.
2. On the CallClerk Dial Out windowclick on the [Send Fax] button.
The TIFF image files that are used by CallClerk for faxing must meet to the following requirements:
The color count must be 1 BPS (Bits per Sample), which means black & white color.
The width of the picture must be 1728 pixels. There is no requirement for the height of the picture.
The resolution must be of 200x200 dpi (Fine Resolution) or 200x100 dpi (Standard Resolution).
The Image must be in uncompressed format or in one of the following compressed format: MH (CCITT Group 3-1D), MR (CCITT Group 3-2D), MMR (CCITT Group 4), Packbits or ZLib
Optionally you may also fax JPG or BMP files, as CallClerk will automatically convert a temporary copy of them to TIFF format before they are sent.
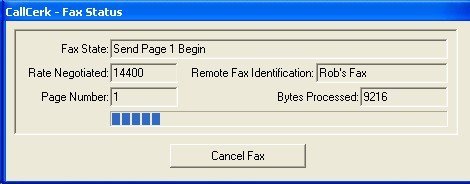
To cancel the fax click the [Cancel Fax] button.
The CallClerk - Fax Status window looks like this: